Tech
Step-by-Step Guide To Operate A Mini Excavator
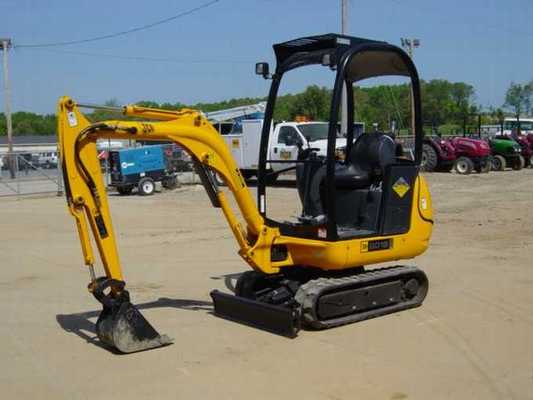
Compared to digging manually, using a mini excavator to get the job done is much easier and quicker. The machine is useful in any situation and its compact size allows it to be used on any construction/digging site as and when required.
You can choose to either purchase or rent the vehicle which can be used for trench work or to just dig a hole in your backyard. The machine is usually controlled by dual joysticks which help you operate the backhoe portion of the excavator. There will be a main boom which is the closest part to the frame, a dipper stick and the bucket which can be curled in or extended out from the stick, as required.
You will also find two travel levers which will be used to move the mini excavator back and forth. The instructions provided in this guide are generic and will help you understand the basics of operating a mini excavator.
However, it is advisable to always read the user’s manual to know model specific functions.
So let’s take a look:
- The First Level of Inspection
After you have found a reliable provider to rent or purchase the machine, start off by inspecting the machine. Take a look inside the mini excavator to make sure there are no dangling parts or damages.
Go around the vehicle to see if there are any blockages found at the ground level, which might hinder your first trial. Sometimes, even a big stone could damage the machine if you fail to notice its presence before moving the stick.
After inspection, get into the operator’s seat of the vehicle. Push the release lever so that you are comfortably seated on your place. Spend a couple of minutes glancing through the controls and keep the owner’s manual handy. Most models will have the same set of levers and joysticks, but the placement could be a bit different based on the brand or model.

Get Moving
Once you are familiar with the controls, push the double travel levers forward to move the mini excavator in a straight path. Return the lever and pull it back; this will start moving the machine backward.
As you gain experience, you will find you are much more comfortable about handling the levers and joysticks together at the same time. Most models will come with a built-in stabilizer, which is mandatory to withstand tough digging jobs and boom swings. Until you get accustomed to the move, make sure to keep the engine speed low as a safety measure. Most minis will have a front bulldozer blade, which is your stabilizer. Pushing the control lever forward will drop it and firmly anchor your vehicle to the ground.
Digging the Site
The left joystick is generally assigned to move the main boom lever. Move it forward to move the boom halfway to its travel range and then start pushing the right joystick forward. It will move the dipper stick into position.
You can curl or close the bucket by moving the right joystick to the right and left. Digging is done for most soil types at a 45 degree angle for best results. When you start the process, make sure to pull the dipper stick and curl the bucket so as to reduce soil spillage. Pull the main boom lever back and swivel the boom to put the soil away from the trench.
Once you master the job, it’s quite easy to dig a trench without having to focus on every action. You can always move your mini excavator forward to go near, as you dig deeper.
You can rent or purchase a mini excavator as well as other building equipment from L&D Earthmoving. For complex jobs, you can always hire a professional from the company who can help you get it done with assured quality.
When operating the mini, make sure you handle the levers smoothly as you would do with gas pedals on a car. They are prone to breaking or getting stuck if you handle them roughly. The process can be repeated to fill a trench but make sure you don’t move your mini over it, until it gets fully filled with soil. Keep a distance of two feet from the edge when working on sandier soils to avoid cave-ins.
Always follow instructions and warnings prescribed in your user manual. Make sure you stick to all the safety instructions while using a mini excavator.
-

 Tech11 years ago
Creating An e-Commerce Website
-

 Tech11 years ago
Design Template Guidelines For Mobile Apps
-

 Business6 years ago
What Is AdsSupply? A Comprehensive Review
-

 Business10 years ago
The Key Types Of Brochure Printing Services
-

 Tech8 years ago
When To Send Your Bulk Messages?
-

 Tech5 years ago
5 Link Building Strategies You Can Apply For Local SEO
-

 Law5 years ago
How Can A Divorce Lawyer Help You Get Through Divorce?
-

 Home Improvement6 years ago
Hоw tо Kеер Antѕ Out оf Yоur Kitсhеn


