General
Method to Configure VPN for iPad 2

iPad 2 is known to be one of the best tablet devices that have been ruling this industry for quite a long time, and this is mainly because of its larger viewing space and different applications that it has to offer people.

People surely love to use internet from their iPad 2 browser, and this is mainly because it gives them more area to view their emails, pictures and to get socialize over multiple social networks. iPad 2 is surely portable, and this is one of the reasons why people love to take it with them outdoors, but when it comes to the internet usage, they are surely concerned way much, as public networks are surely not safe, and one needs the assistance of VPN services in order to browse safely.
If you have bought a new iPad 2, than you surely need to configure VPN service in your iPad 2 before you can actually start using it. In the following lines you will get to know the method to configure your iPad 2.
Downloading VPN app from iTunes:
The very first thing that you need to do is to download a VPN client from iTunes in your iPad 2. Any Connect is known to be the Cisco VPN client that can be downloaded in your iPad 2 free of charge, so it is recommended that you download it in first place.
Wi-Fi connection verification:
In order to verify whether your Wi-Fi is on in your iPad 2, all you have to do is to:
• Go into settings of iPad 2.
• Go into the settings of Wi-Fi and turn it ON.
Adding VPN configuration in iPad 2:
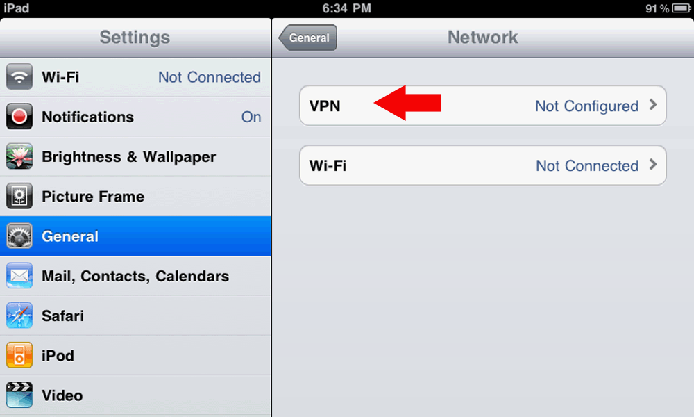
Now after you are done with the verification of Wi-Fi, the next thing that you need to do is to Tap on the general menu and afterwards go into the Network section. Now the next thing that you need to do is to Add VPN configuration.
As you are going with Any Connect of Cisco, therefore you can find all the VPN configuration settings on Cisco’s Any Connect page, so all you have to do is to copy all that information and paste it in the required sections one by one, and make sure that you insert right information in right column, else it won’t work and you have to reenter all of that again. Make sure to turn Off RSA SecurId.
Turn on Traffic section:
After you are done with it, now all you have to do is to Tap on “Send All Traffic” in order to turn it On, and in order to save it press Save Button.
Enter and Save Password in iPad 2:
Now after you are done with all that, the next thing that you need to do is to Enter and Save the password. You can save your password, so that you don’t need to retype it again and again. One more thing, make sure that you enter and save the new password whenever it is updated. After doing with that, wait for your VPN to authenticate.
How to confirm whether it is configured correctly or not?
If VPN is indicated as On under Network Settings as well as on the top right indicator than it means that you have configured VPN service in your iPad 2 correctly.
The article is written by Uzma Parveen who loves to describe the necessity of Best Mac VPN for internet users.
-

 Tech11 years ago
Creating An e-Commerce Website
-

 Tech11 years ago
Design Template Guidelines For Mobile Apps
-

 Business6 years ago
What Is AdsSupply? A Comprehensive Review
-

 Business10 years ago
The Key Types Of Brochure Printing Services
-

 Tech8 years ago
When To Send Your Bulk Messages?
-

 Tech5 years ago
5 Link Building Strategies You Can Apply For Local SEO
-

 Law5 years ago
How Can A Divorce Lawyer Help You Get Through Divorce?
-

 Home Improvement6 years ago
Hоw tо Kеер Antѕ Out оf Yоur Kitсhеn


