Lifestyle
10 Basic Sketching Techniques For Beginners

Lacking the gravitas as that of oil paints, pencil may not seem a showy artistic medium to many. However, if put in the right hands, this plebeian medium can produce remarkable works of art, often unbelievable.
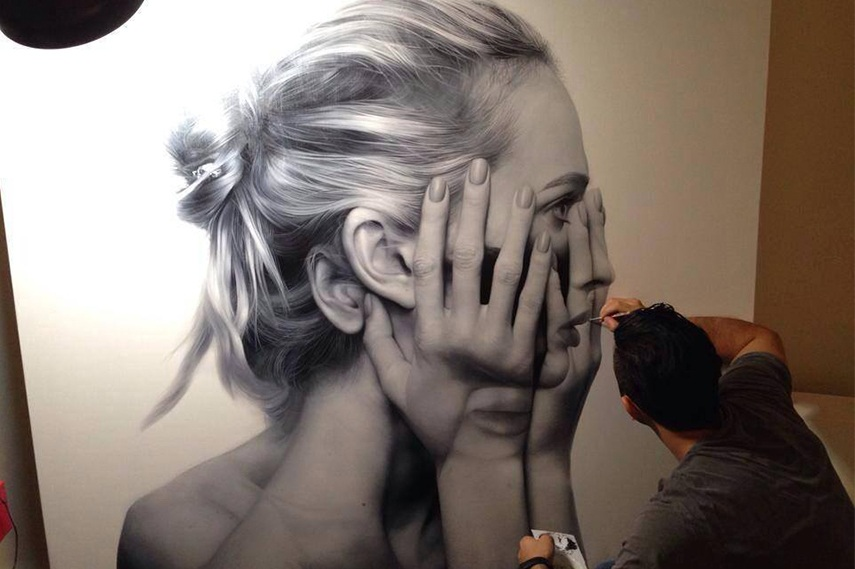
There is this genre of pencil portrait artists who have created stunning artworks wherein the line between reality and art is practically erased in drawings.
Planning to draw some inspiration from these adept artists and start your sketching journey? We are here to help!
We have compiled tips from these experienced artists who have mastered the art of pencil sketching to help you get going with confidence and build your skillset.
- Know more about your pencils
While learning how to draw, don’t just stick to traditional pencils but also use mechanical pencils. Traditional pencils will help you cover the texture of large portions of your drawing while mechanical ones will help you with the minute detailing work.
However, having the right pencil for your sketch is quite essential and can be a daunting task if you don’t know the basics.
Remember these three criteria while choosing your ideal mechanical pencil:
graphite, or ‘lead’ size, graphite hardness (ranging from 9H to 9B) and, the material.
The hardness of the graphite is clearly indicated on the side of the pencil wherein ‘H’ pencils are harder, ‘B’ ones are softer and darker while ‘HB’ pencils gives you only the middle range to work with. It is always recommended to begin somewhere on the H scale and gradually move to the darker B scale while finishing.
- Learn to take control of your pencil
You know how to hold your pencil, but are you holding it correctly for your sketch? A better grasp of your pencil will help you gain greater certainty and control leading to a better grasp of drawing.
For more control and precision, position your hand closer to the end of the pencil. It will help you achieve heavier strokes and thereby darker markings. Holding the pencil further up will help you lay down lighter strokes and lighter markings.
- Try different basic sketching methods
There are plenty of sketching techniques to help you create form and depth and achieve different styles and effects in your drawing.
It’s important to try and experiment with different sketching methods, which will help you gradually to find out what works best for you. In fact, try experimenting with different pencil grades to create a variety of marks and come up with visually interesting drawing.
Try practising these sketching techniques more often to not only find the one which complements but also enhances your style.
- Play with lines
Lines are a vital component of pencil sketching.
Use varied lines with subtle shifts in the width and darkness. The technique of controlling the lines and its shades may seem quite tricky in the beginning, but with practice, you will be able to master this and create varied lines that work together to make a cohesive image.
- Control the edges
Famous sketch artist, Von Rueden uses four different techniques to define the edges of any object— thin, hard, lost and undefined (as in the image below). He further describes that a thin and hard edge gives objects solid borders while lost edges occur when the subject or the background values start to blend together. The last one, called undefined edges need to be deciphered by the viewer themselves. You should try to explore all these four types of edges, and try combining them to create interesting aspects within your artwork.
- Learn to blend
Pencil lines don’t blend flawlessly unless you are very careful. If done properly, you can create smooth, blended effects using pencils for your drawing such as a sky.
However, make sure you don’t use your finger to blend as the oils from your skin will end up ruining the sketch.
It is always better to use a blending stick to avoid the initial scribbles showing through. Go for a small circular motion for even blending for a more smoother and natural look.
- Follow the 70:30 rule
Remember the rule: ‘Less can be more’. Keep the main focal point within around 30 per cent of the sketch image, it will help gain direct attention towards the main subject of your artwork.
All you need is to make sure that 30 per cent of your sketch is filled with the main focus and detail, while the remaining 70 per cent is only the filler. This will help you create effective compositions.
- Begin with basics and then get into the details
It is better for you to avoid choosing complicated shapes as your subjects while sketching.
Start off by sketching simpler shapes such as sky or clouds, and get your basics right before heading on to sketch human faces, animals and other complicated figures.
- Differentiate different textures
Adjust your sketching technique to show different textures within your artwork. Every object has its own unique properties and hence, you need to create variations in your sketching to capture the detail accurately, for example, you would never shade skin the same way you shade metallics or coarse grass.
Understanding the texture is the key, pay attention to if the texture is rough or smooth and then if it absorbs or reflects light. If in doubt, simply follow this and you can never go wrong: a reflecting and smooth texture has higher contrasts and prominent highlights, while an absorbing or rough texture has low contrasts and negligible highlights.
- Add imperfections and details
Learn to add some more realistic textures and imperfections to your sketch to make it more dynamic and interesting. Look beyond what makes an object recognizable which will help you make it look distinctive in your artwork.
Final Words
Once you start sketching, try to be yourself, don’t restrict to any particular style or technique.
Trust your intuition, set yourself free and embark on the interesting sketching journey!
-

 Tech11 years ago
Creating An e-Commerce Website
-

 Tech11 years ago
Design Template Guidelines For Mobile Apps
-

 Business6 years ago
What Is AdsSupply? A Comprehensive Review
-

 Business10 years ago
The Key Types Of Brochure Printing Services
-

 Tech8 years ago
When To Send Your Bulk Messages?
-

 Tech5 years ago
5 Link Building Strategies You Can Apply For Local SEO
-

 Law5 years ago
How Can A Divorce Lawyer Help You Get Through Divorce?
-

 Home Improvement6 years ago
Hоw tо Kеер Antѕ Out оf Yоur Kitсhеn


